I wanted to try something new. I made Fougasse bread for lunch. Fougesse is a classically thin plain bread and flatbread mostly in the shape of a leaf.
Actually you can make your own Fougesse. Add some herbs such as rosemary or thyme in to the dough. Add more filling such as olives, feta cheese and anything.
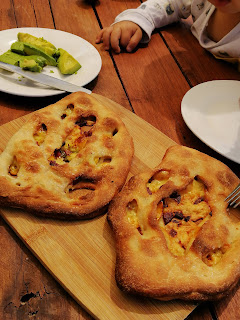
Salami and cheese stuffed Fougesse
(Makes 2)
Bread
Flour 200g
Salt 1 tea spoon
Instant yeast 1tea spoon
Olive oil 20g
Water (luke-warm) 120g
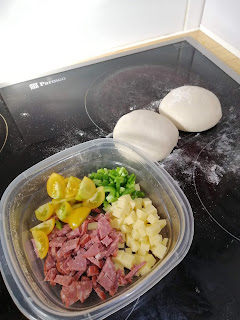
Filling
Salami, Grated cheese, cherry tomato, Capsicum and whatever you like
Extra
Olive oil
Coarse salt
1. In a mixing bowl, combine the bread ingredients. Mix it with a spoon or spatula until combined. Turn out on flour board, wet hands and knead until fully incorporated.
2. Put the dough into the lightly oiled container with a cover. Let it proof for 1-1.5 hours until it becomes double size.
3. While the bread is rising, prepare the fillngs. Chop and put them aside.
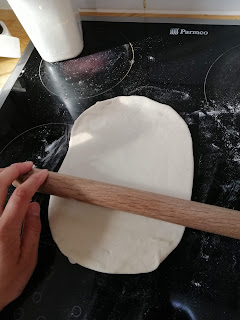
4. Pour the dough on the floured board, divide into half evenly. Make it a rough ball, and rest it for 20 minutes.
5. Roll the dough out on a floured surface to a rough rectangle. Keep the rolling pin and surface floured to prevent sticking.
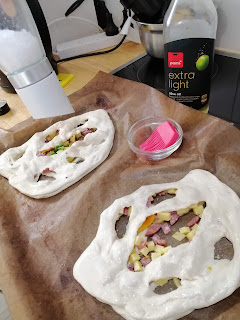
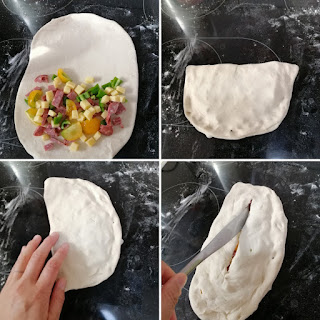
6. Transfer the dough to baking paper. Top the fillings on the half of the dough.
Fold over to cover the filings, and pinch to seal. Use a pizza cutter or butter knife to slit the dough.
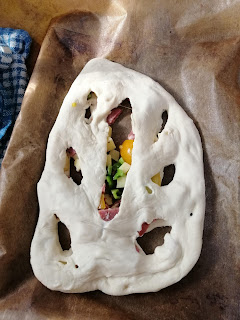
7.Rise is 30-40 mins.
8. Preheat the oven at 200℃.
Brush olive oil and sprinkle coarse salt on top of the bread.